
To set up Home Assistant, you’ll need hardware with at least a 1GHz processor and 2GB RAM (4GB recommended for complex systems). Storage requires a minimum 32GB microSD card or SSD. You can run Home Assistant OS for an integrated experience or use Docker containers for more flexibility. Secure your system with static IP addresses, strong passwords, and regular updates. A proper network setup with VLAN segregation improves security. These fundamentals will support your expedition into smart home automation.
Essential Hardware Components for Home Assistant
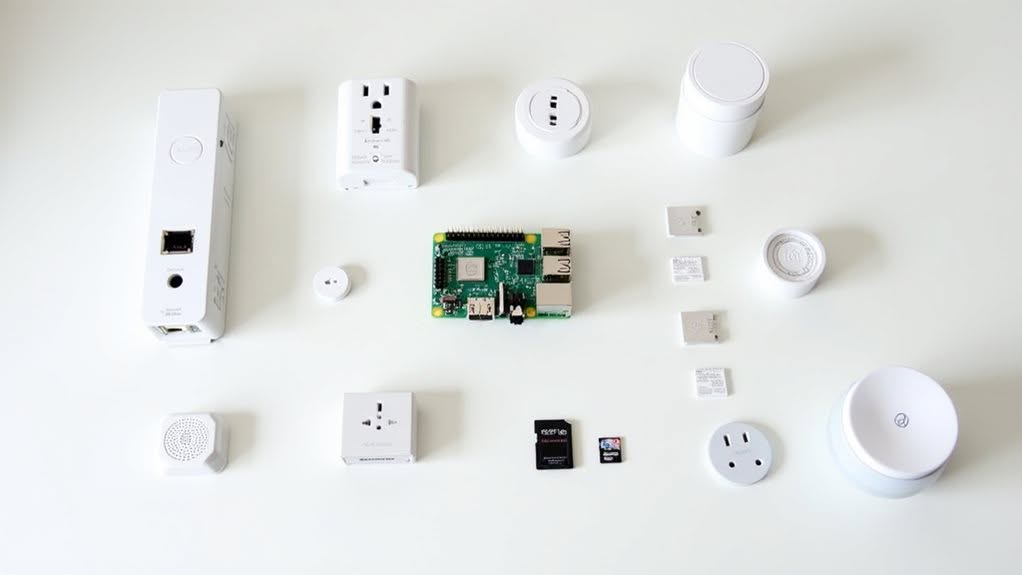
Five key hardware components form the foundation of any Home Assistant setup. Understanding each element will help you build a reliable smart home hub.
Your processor needs at least 1 GHz speed for basic operations, with quad-core CPUs preferred for running multiple add-ons. Popular options include Raspberry Pi boards, Intel NUC models, and the ODROID-M1.
For memory, you’ll need a minimum of 2GB RAM, though 4GB is recommended when using several integrations simultaneously. This prevents system lag during complex automations.
Storage options include microSD cards (32GB minimum), eMMC, and SSDs. Choose reliable brands like SanDisk or Samsung for durability. Heat management becomes critical when using more powerful hardware to prevent performance throttling and extend device lifespan.
Network connectivity through Gigabit Ethernet guarantees stable performance, though Wi-Fi is available on many devices. For broader device compatibility, consider adding a SkyConnect USB stick that provides Zigbee connectivity and future Matter support.
Finally, protective cases and appropriate power supplies safeguard your investment. A dedicated Home Assistant hub can streamline your setup process while providing optimized performance for smart home automation.
Software Options and System Requirements
While hardware forms the foundation of your Home Assistant setup, selecting the right software environment guarantees peak performance and functionality for your smart home hub.
Home Assistant Operating System (HA OS) offers the most integrated experience, with automatic updates and an add-on store for installing services like Plex and Zigbee2MQTT directly. For those preferring flexibility, containerized options via Docker or traditional Linux installations provide alternatives.
HA OS delivers a streamlined experience with automation and add-ons, while Docker and Linux options cater to power users needing customization.
You’ll need a device with at least 2GB of RAM and 32GB of storage. A Raspberry Pi 4 works well for beginners, but larger setups benefit from more powerful hardware like the ODROID-N2+ or x86 PCs. Alternatives such as Banana Pi BPI-CM4 can provide similar functionality in a compact design for embedded systems.
The web-based dashboard makes device management and automation creation straightforward without editing files directly. Mobile apps extend control to your smartphone when away from home. The system functions locally without requiring an internet connection, ensuring your smart home remains operational even during network outages.
Network Setup and Connectivity Considerations
Your Home Assistant system requires a robust network infrastructure with reliable Wi-Fi coverage and a static IP address for consistent access.
Your network needs to support multicast DNS for device discovery and compatibility with various wireless protocols like Zigbee, Z-Wave, or Bluetooth, depending on your smart device ecosystem. Home Assistant uses auto detection based on the system routing next hop for the mDNS broadcast address (224.0.0.251) to identify the appropriate interface for communication.
You’ll need to implement proper security measures for remote access, such as using a VPN or secure tunneling service rather than exposing your system directly to the internet. For enhanced security and organization, consider implementing network segmentation by creating separate VLANs for your IoT devices and regular network traffic.
Network Infrastructure Requirements
Setting up a robust network infrastructure is critical for a reliable Home Assistant deployment.
You’ll need to implement VLAN segregation to isolate IoT devices from your main network, improving both security and traffic management.
Your network switches must be configured to assign appropriate VLAN memberships to each port.
Devices that connect multiple networks, like access points and firewalls, need proper VLAN tagging to handle traffic correctly.
Consider a dual-network setup for your Home Assistant host, allowing it to communicate with devices across different VLANs while maintaining security boundaries.
This may require multiple IP addresses or separate network interfaces.
Configure your firewall with specific rules that permit Home Assistant to control IoT devices while blocking other potentially risky inter-VLAN traffic.
Regular monitoring of network activity will help identify and address security concerns.
It is recommended to create a segregated network where IoT devices have Internet access only without being able to reach your secure LAN segments.
For effective device management, assign static IP addresses to all IoT devices within their respective VLANs for consistent and reliable connections.
Wireless Protocol Compatibility
With your network infrastructure in place, the next consideration for your Home Assistant setup involves selecting compatible wireless protocols for your smart devices. Home Assistant supports several major protocols, each with distinct advantages.
Zigbee creates a mesh network on the 2.4 GHz band, extending device range throughout your home and requiring relatively low power. You’ll need a compatible radio like Silicon Labs EmberZNet or deCONZ for integration. Zigbee networks can significantly enhance coverage by utilizing multiple router devices positioned strategically throughout your home. Home Assistant users can add ZBT-1 dongles to enable support for both Zigbee and Thread protocols.
Z-Wave operates on sub-GHz frequencies, reducing interference from Wi-Fi networks and providing reliable connectivity through USB hubs like GoControl.
Your protocol choices should consider:
- Power requirements (battery vs. wired devices)
- Range needs within your home’s layout
- Existing device compatibility and ecosystem preferences
Wi-Fi devices offer direct integration but consume more power, while Thread provides IP-based networking with growing device support through compatible border routers.
Remote Access Security
Securing remote access to your Home Assistant installation represents a critical step in protecting your smart home from unauthorized intrusion.
You’ll need to implement specific security measures to maintain control over who accesses your system.
Consider using Home Assistant Cloud (Nabu Casa) or VPN solutions like WireGuard for secure remote connections without exposing ports.
Alternatively, set up a reverse proxy with SSL certificates through services like Let’s Encrypt.
Enable multi-factor authentication and create strong, unique passwords for all user accounts.
Implement IP banning to block repeated login attempts, and regularly update your system to patch security vulnerabilities.
For network security, avoid direct port forwarding whenever possible.
Instead, isolate Home Assistant on a separate network segment and configure firewalls to restrict unauthorized access to your smart home system.
Understanding Devices and Entities
When you begin working with Home Assistant, understanding the relationship between devices and entities becomes essential for effective smart home management.
Devices represent physical or virtual hardware units, while entities are the individual functions or data points within those devices. A smart motion sensor device, for instance, might contain multiple entities tracking motion, temperature, and light levels. This hierarchical structure helps you organize your smart home logically.
- Devices consolidate multiple entities under one management interface, making it easier to track performance and troubleshoot issues.
- Entities have unique identifiers, states, and attributes that can be referenced in automations and displayed on dashboards.
- Both devices and entities are accessible through separate tabs in the Home Assistant interface for straightforward configuration.
Integration Domains and Smart Device Compatibility
Integration domains in Home Assistant classify your devices into specific categories like lights, switches, or climate controls, determining how they function within the system.
Your smart device’s compatibility depends on whether its protocol (Zigbee, Z-Wave, Wi-Fi) is supported by an available Home Assistant integration matching the appropriate domain.
Selecting devices with protocols that map cleanly to Home Assistant domains guarantees better functionality, while incompatible devices may require custom integrations or community-developed workarounds.
Integration Domains Explained
Home Assistant’s architecture relies on integration domains as the foundation for all smart device compatibility and functionality. These domains serve as unique identifiers for specific areas of functionality, guaranteeing consistent behavior across your smart home ecosystem.
When you set up devices in Home Assistant, they’re organized by domains that standardize how you interact with them, regardless of manufacturer.
- Domains like `light`, `switch`, and `climate` define specific functions and entities within your system.
- Each integration is responsible for a specific domain, handling events, actions, and states.
- Integrations can provide custom services beyond standard entity actions, such as specialized commands for specific device brands.
Integration domains allow Home Assistant to create a unified interface for controlling diverse smart home products through standardized entities and consistent commands.
Smart Device Protocol Support
For a truly connected smart home, your Home Assistant setup requires compatible protocols that facilitate seamless communication between devices.
You’ll need to choose between several wireless standards based on your specific needs.
Zigbee offers reliable mesh networking that’s ideal for battery-powered sensors and lighting, while Wi-Fi provides extensive coverage for high-bandwidth devices like cameras. Both integrate directly with Home Assistant.
Bluetooth Low Energy (BLE) excels with power-efficient sensors but has limited range compared to other protocols.
Z-Wave creates self-healing mesh networks with strong AES-128 encryption for secure device communication.
The emerging Matter protocol aims to unify these standards, promoting compatibility between different smart home ecosystems.
When planning your system, consider each protocol’s power requirements, range limitations, and security features to build a robust smart home network.
Initial Configuration and Dashboard Setup

Once you’ve accessed your Home Assistant instance at port 8123, the initial setup wizard guides you through creating an admin account and establishing location details.
The preparation time varies depending on your hardware and internet connection, but be patient during this vital phase.
Home Assistant automatically detects IoT devices on your network during setup, making integration seamless.
The dashboard interface serves as your central hub for controlling all smart home devices, with customizable layouts to suit your preferences.
After initial setup, you’ll want to explore these key areas:
- Network Configuration – Adjust settings via Settings > System > Network
- User Accounts – Create additional accounts for family members
- Backup Options – Set up regular backups to protect your configuration
You can also create groups and scenes to manage multiple devices simultaneously, improving your smart home experience.
Expanding Your System With Automations and Add-Ons
After establishing your initial Home Assistant environment, you’ll want to improve its capabilities through automations and add-ons.
Automations can considerably boost your smart home’s functionality by responding to triggers like sensor states or time events. You can create safety features such as panic buttons that send alerts to specific people or automate your fireplace to shut down based on temperature limits.
Automate your home for both convenience and safety—from emergency alerts to temperature-controlled fireplaces.
Energy monitoring automations will help track power usage and costs over time. When building automations, you’ll need to select the appropriate execution mode—single, restart, queued, or parallel—depending on your particular requirements.
Consider combining multiple triggers with conditions for more advanced control.
Add-ons extend functionality further, offering services like MQTT brokers and visual automation tools through Node-RED.
Remember to test all automations thoroughly before relying on them daily.
Frequently Asked Questions
Can Home Assistant Work Without Internet After Initial Setup?
Yes, Home Assistant works without internet after setup. Your local automations, Zigbee, Z-Wave, and Wi-Fi devices on LAN will function normally, but cloud-dependent integrations and remote access won’t be available.
How Much Power Does Running Home Assistant Continuously Consume?
Home Assistant itself consumes minimal power, typically under 5 watts when running on a Raspberry Pi. Your total power usage depends on your host device and any integrated smart devices you’re controlling.
Will Home Assistant Work With My Existing Non-Smart Appliances?
Yes, you can integrate your non-smart appliances with Home Assistant using smart modules like Z-Wave, Zigbee, or Sonoff devices. You’ll need to connect these modules to your appliances and configure them properly.
Can Home Assistant Integrate With My Security System or Cameras?
Yes, Home Assistant can integrate with your security system and cameras. It supports many alarm systems like Abode, Ring, and Konnected, plus popular camera brands through direct integration or ONVIF protocol support.
Does Home Assistant Send My Data to the Cloud?
No, Home Assistant doesn’t send your data to the cloud by default. It’s designed for local processing. Cloud features are optional through Home Assistant Cloud or third-party integrations that you must explicitly enable.
Final Thoughts
You’ve now learned everything needed to start your Home Assistant expedition. With the right hardware, software, network setup, and understanding of devices, you’re ready to build a customized smart home. Remember that starting small and expanding gradually will help you avoid feeling overwhelmed. As you become more comfortable, you can create advanced automations and add more devices to make your home truly smart.


